BravePDF - AI-Powered PDF Tool Suite
BravePDF is a comprehensive, AI-powered web application for all your PDF needs.
Built with a modern tech stack, it provides a suite of powerful tools ranging from
document conversion and optimization to intelligent analysis and interaction.
This source code provides a ready-to-deploy, subscription-based SaaS application
that you can sell to your own customers.
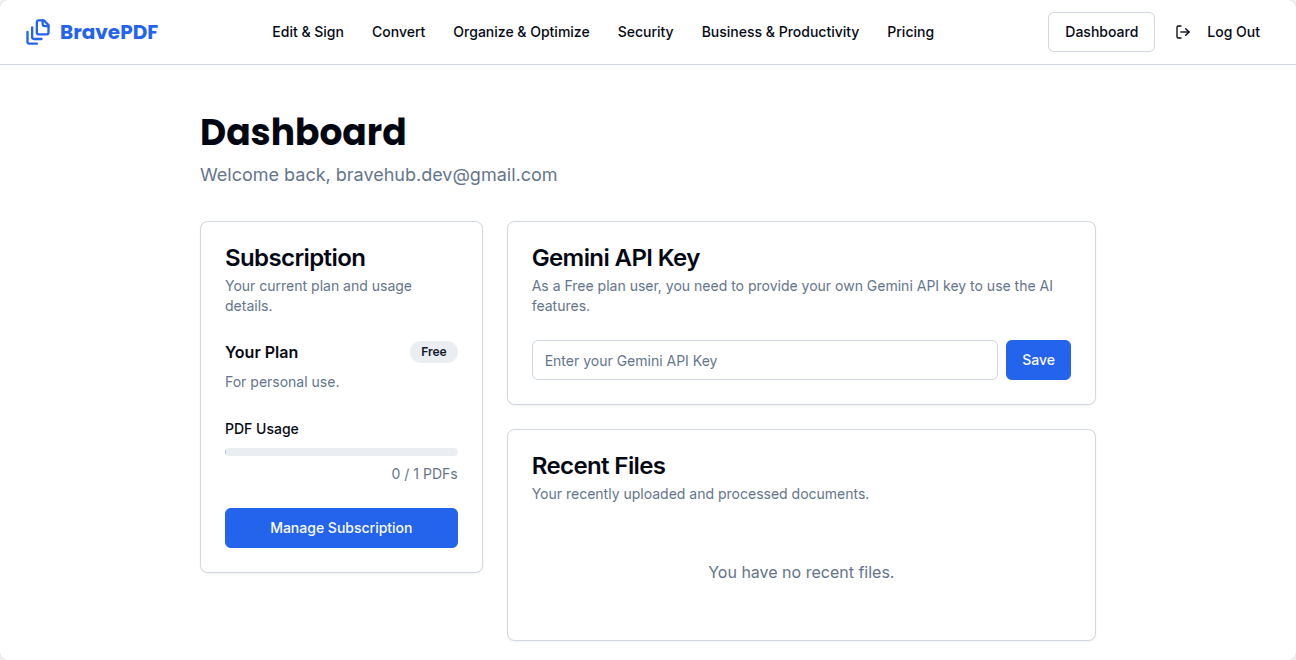
User Dashboard
Features
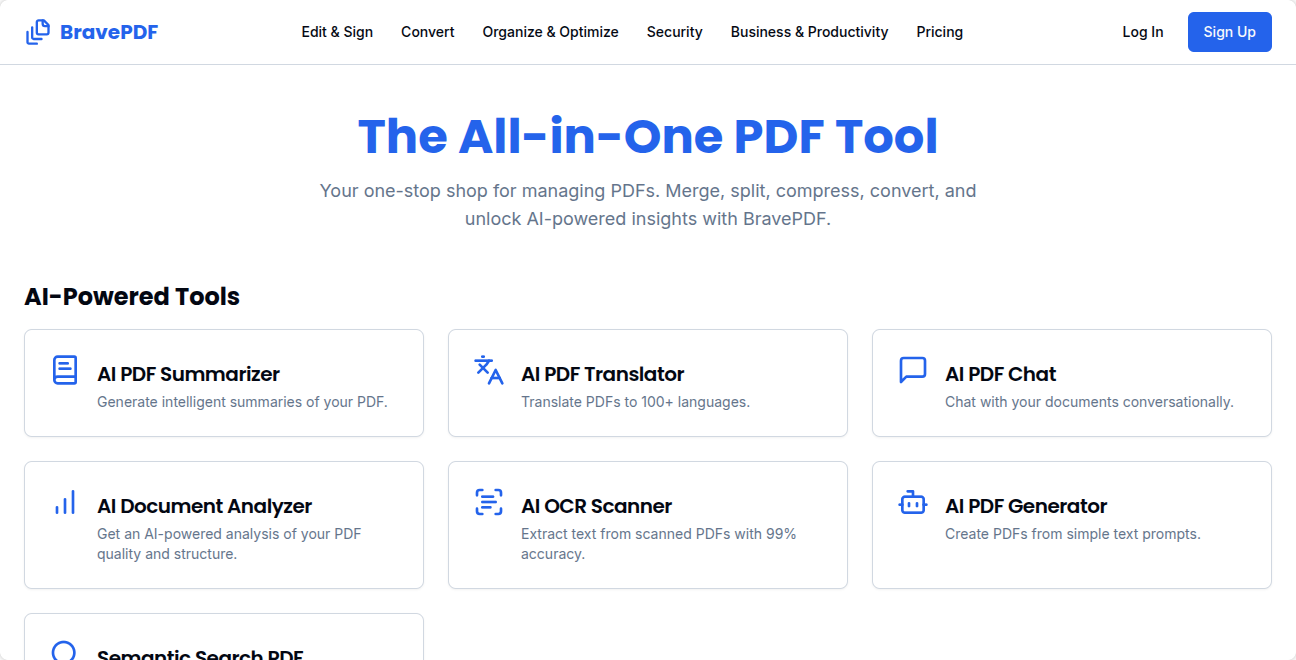
- AI-Powered Tools: Summarize, translate, chat with, analyze, and generate PDFs using AI. Includes an OCR scanner and semantic search.
- Convert & Create: Convert PDFs to and from formats like Word, PowerPoint, Image, HTML, Text, CSV, XML, and EPUB.
- Organize & Optimize: Merge, split, compress, rotate, reorder pages, manage bookmarks, and compare PDF versions.
- Edit & Sign: eSign documents, crop pages, remove backgrounds, create and fill forms, and redact sensitive information.
- Security: Protect with passwords, unlock secured files, add watermarks, and scan for viruses.
- Business & Productivity: Generate professional invoices, reports, certificates, and QR codes.
- SaaS & Monetization:
- User authentication (Login/Signup).
- Multi-tier subscription plans (Free, Pro, Pro+).
- Seamless checkout process powered by Stripe.
- Feature gating based on subscription plans.
- User dashboard to manage subscriptions and usage.
- Superadmin panel for site management.
Tech Stack
Prerequisites
Before you begin, ensure you have the following accounts and tools set up:
- Node.js: v18.x or later.
- Firebase Account: To manage users, data, and service credentials.
- Google AI (Gemini) API Key: To power the AI features.
- Stripe Account: To process subscription payments.
- Vercel Account: For easy deployment and hosting.
.env Configuration
Rename the .env.example file to .env.local and fill in your actual environment variables.
Do NOT commit .env.local to version control.
# --- Firebase Client Configuration ---
NEXT_PUBLIC_FIREBASE_API_KEY="AIza..."
NEXT_PUBLIC_FIREBASE_AUTH_DOMAIN="your-project-id.firebaseapp.com"
NEXT_PUBLIC_FIREBASE_PROJECT_ID="your-project-id"
NEXT_PUBLIC_FIREBASE_STORAGE_BUCKET="your-project-id.appspot.com"
NEXT_PUBLIC_FIREBASE_MESSAGING_SENDER_ID="..."
NEXT_PUBLIC_FIREBASE_APP_ID="1:..."

# --- Firebase Admin/Server Configuration ---
FIREBASE_PROJECT_ID="your-project-id"
FIREBASE_CLIENT_EMAIL="firebase-adminsdk-xxx@your-project-id.iam.gserviceaccount.com"
FIREBASE_PRIVATE_KEY="-----BEGIN PRIVATE KEY-----\n...\n-----END PRIVATE KEY-----\n"

# --- Stripe Configuration ---
STRIPE_SECRET_KEY="sk_test_..."
NEXT_PUBLIC_STRIPE_PUBLISHABLE_KEY="pk_test_..."
STRIPE_WEBHOOK_SECRET="whsec_..."

# --- Google AI (Gemini) Configuration ---
GEMINI_API_KEY="AIza..."
Step-by-Step Setup Instructions
1. Initial Project Setup
- Download and extract the source code folder.
- Open your terminal, navigate into the project directory, and install dependencies:
yarn install
- Rename
.env.example to .env.local:
mv .env.example .env.local
- Fill in your
.env.local file with your actual values (see .env Configuration section above).
2. Firebase Configuration
- Create a Firebase Project: Go to the Firebase Console and create a new project.
- Create a Web App:
- In your project dashboard, click the Web icon (</>) to create a new web app.
- Give it a nickname (e.g., "BravePDF Web").
- Copy the
firebaseConfig object values into your .env.local under NEXT_PUBLIC_FIREBASE_* variables.
- Enable Firestore & Authentication:
- Create Firestore database in Production mode and select your preferred location.
- Enable Email/Password sign-in in Authentication settings.
- Create a Service Account:
- Go to Project settings > Service accounts, generate new private key, download JSON.
- Copy
project_id, client_email, and private_key into .env.local.
- Format
FIREBASE_PRIVATE_KEY correctly with double quotes and \n for new lines.
3. Stripe Configuration
- Create Products & Prices:
- Create "Pro" and "Pro+" products with recurring monthly prices in Stripe dashboard.
- Copy their Price IDs and update
src/app/pricing/page.tsx accordingly.
- Get API Keys:
- Copy Publishable and Secret API keys into
.env.local.
- Set Up Webhook:
- Add webhook endpoint:
https://<YOUR_VERCEL_URL>/api/stripe-webhook.
- Add events:
checkout.session.completed, invoice.payment_succeeded.
- Copy webhook signing secret into
STRIPE_WEBHOOK_SECRET.
4. Google AI (Gemini) API Key
- Go to Google AI Studio.
- Create and copy your API key into
GEMINI_API_KEY in .env.local.
Superadmin Access
To gain superadmin access to manage users and analytics:
- Sign up for an account using the app's signup page.
- Find your user UID in Firebase Authentication section.
- In Firestore database, update your user document’s
role field from "user" to "superadmin".
- Log out and back in; you will now see admin panel access.
Deployment to Vercel or Netlify
Recommended hosting is Vercel, but you may also use Netlify or any other platform that supports Next.js.
- Push your source code to a GitHub repository.
- Import the repo into your Vercel or Netlify account.
- Configure environment variables on your hosting platform exactly as in your local
.env.local file.
- Trigger a deploy/build. The platform will install dependencies using
yarn automatically.
- After deployment, update your Stripe webhook endpoint with the production URL provided by your host.
Local Development
To run the application locally:
yarn dev
This will start the app on http://localhost:9002.
Congratulations! Your AI-powered PDF SaaS is now fully configured and ready to be marketed.